
How to fix the color of your dive videos
Three steps, no settings to learn. The tool runs in Chrome or Edge on your own computer, so nothing is uploaded and a 4K clip takes about as long as it is. Here is the whole flow with screenshots, followed by tips for the tricky scenes.
Open the app
Go to nordrift.dk/color-correction/app in Chrome or Edge. There is no account and nothing to install. Copy your videos from the GoPro or phone to the computer first – the tool reads MP4 and MOV in H.264 and HEVC, including 10-bit and 4K at 60 fps.
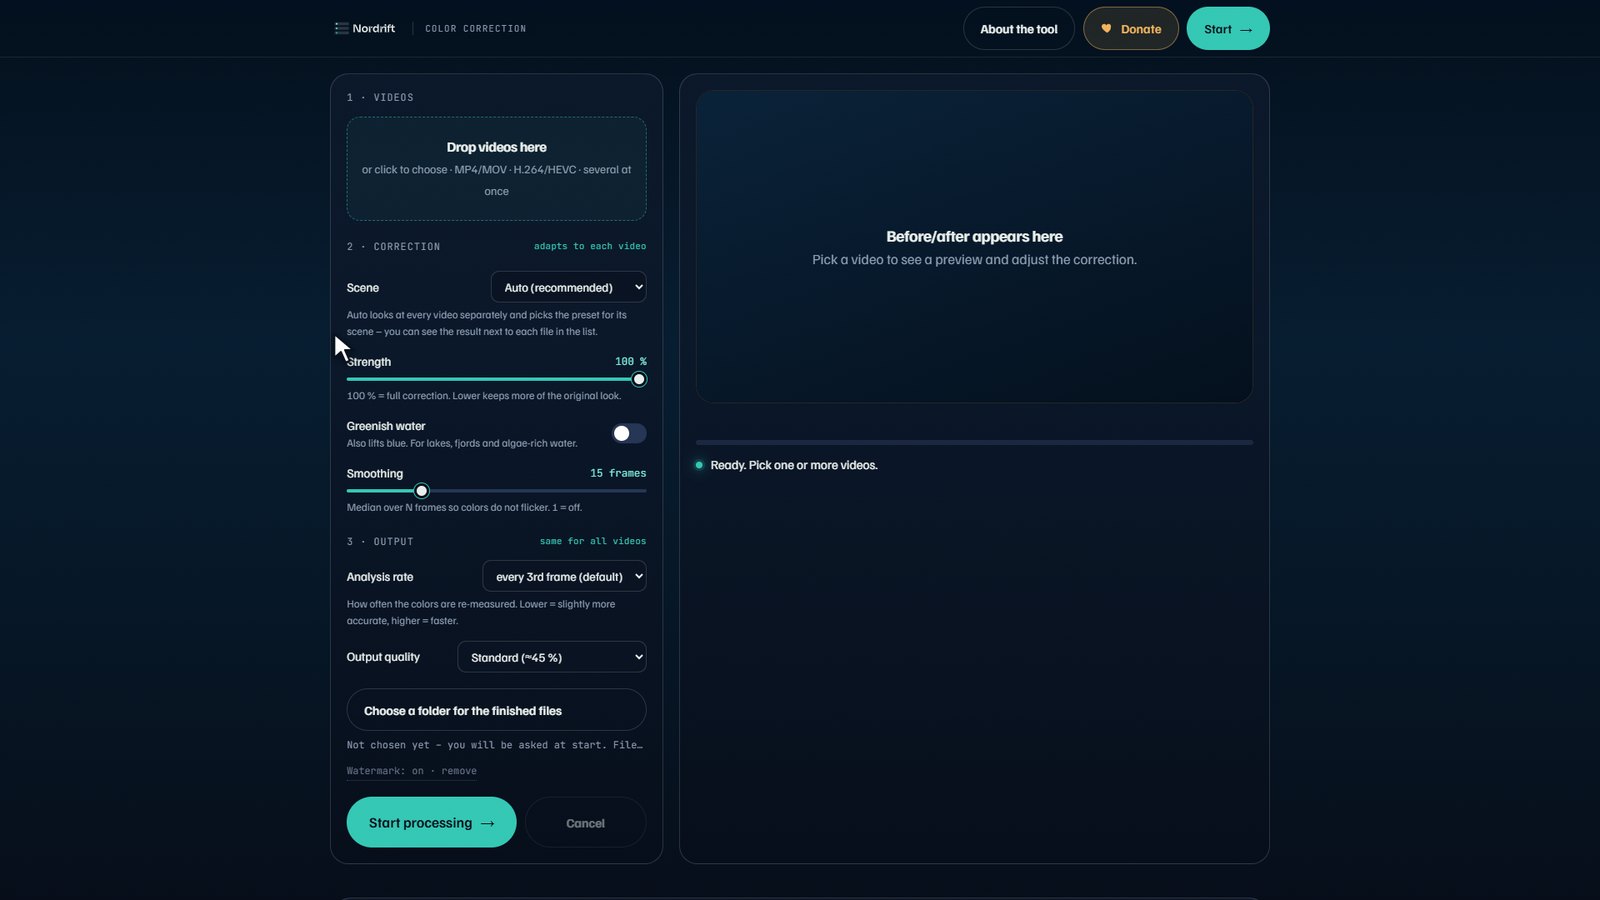
Drop your videos
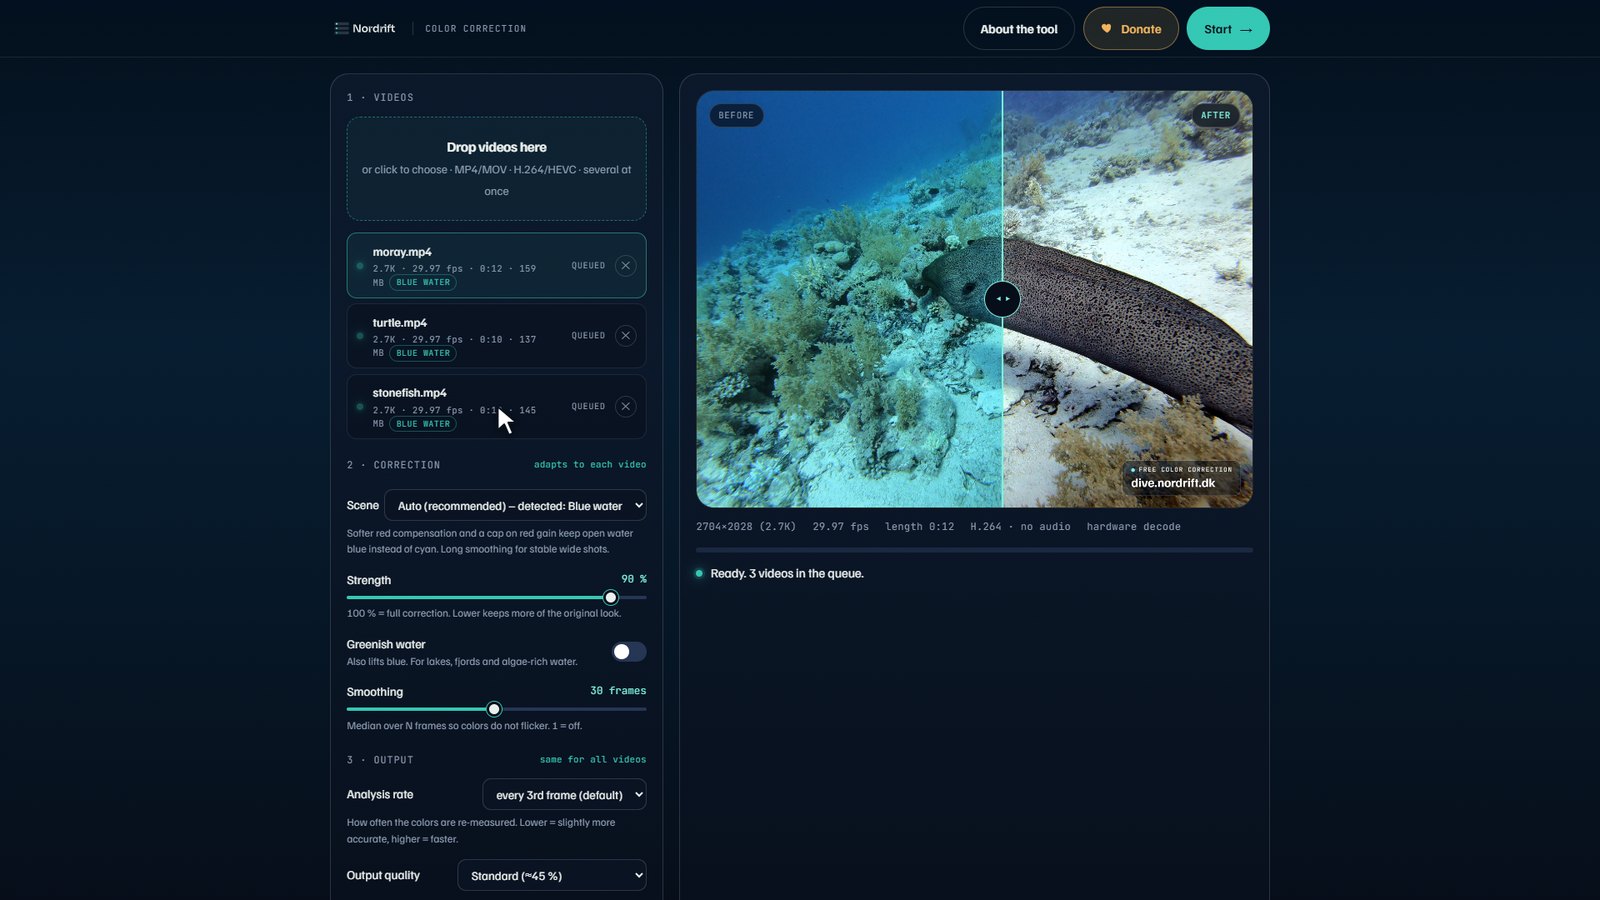
Drag the files into the dotted box, or click it to choose. You can add a whole dive at once – every file is queued and processed one after the other. The tool reads each clip and detects its scene: open water, reef, close-up, green water, night or hazy. The badge next to each file tells you what it found.
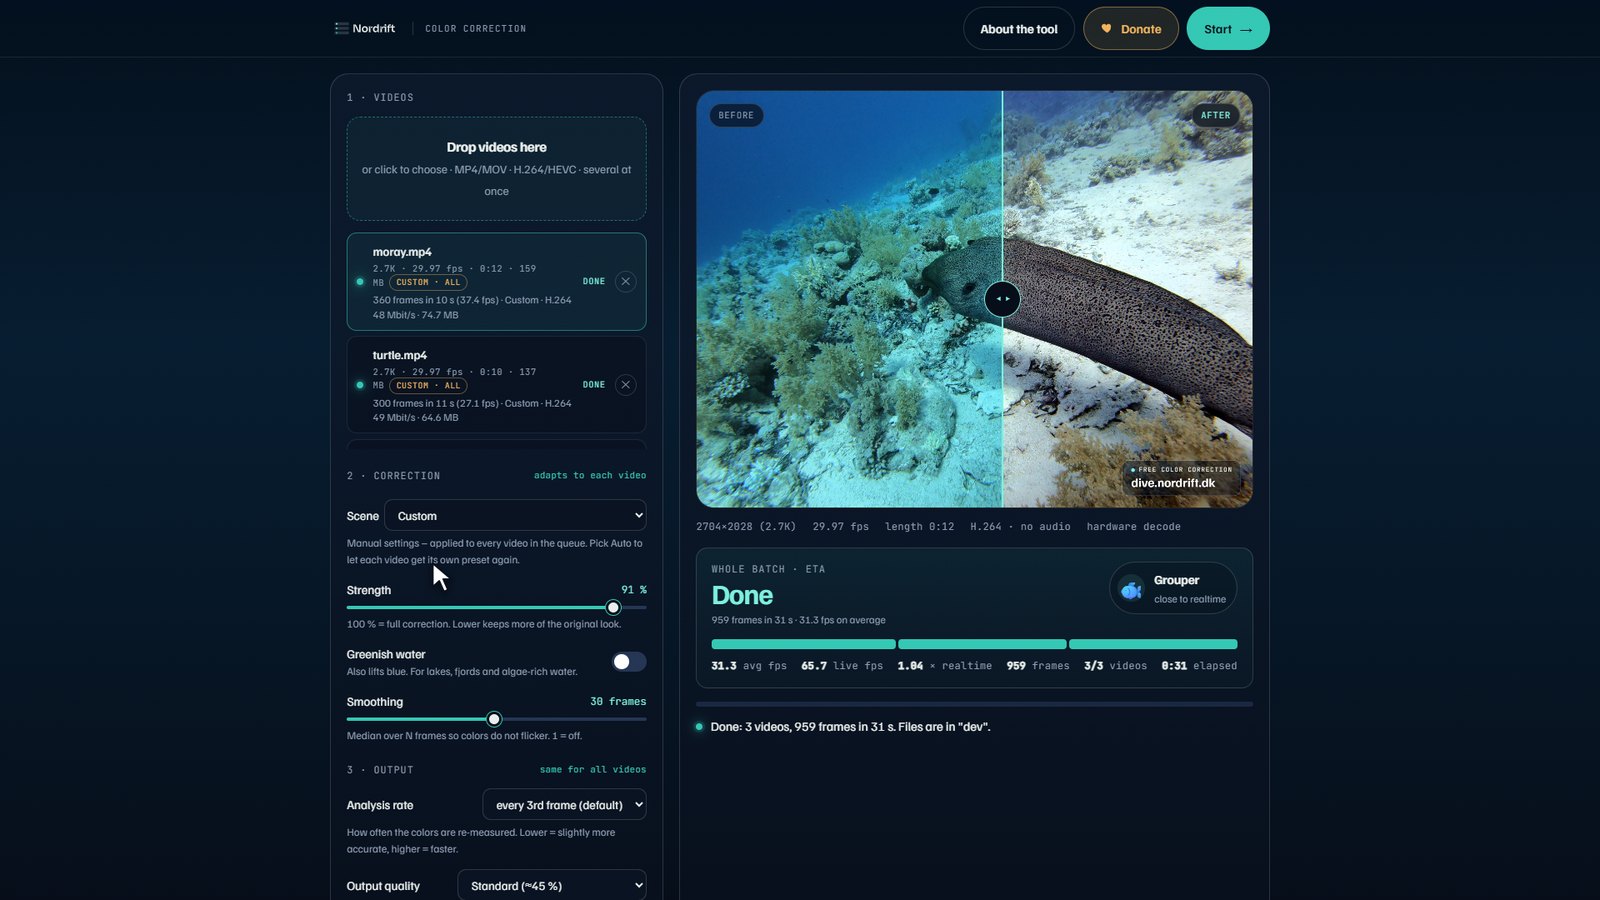
Click a file to see a live before/after preview. Drag the line in the preview to compare.
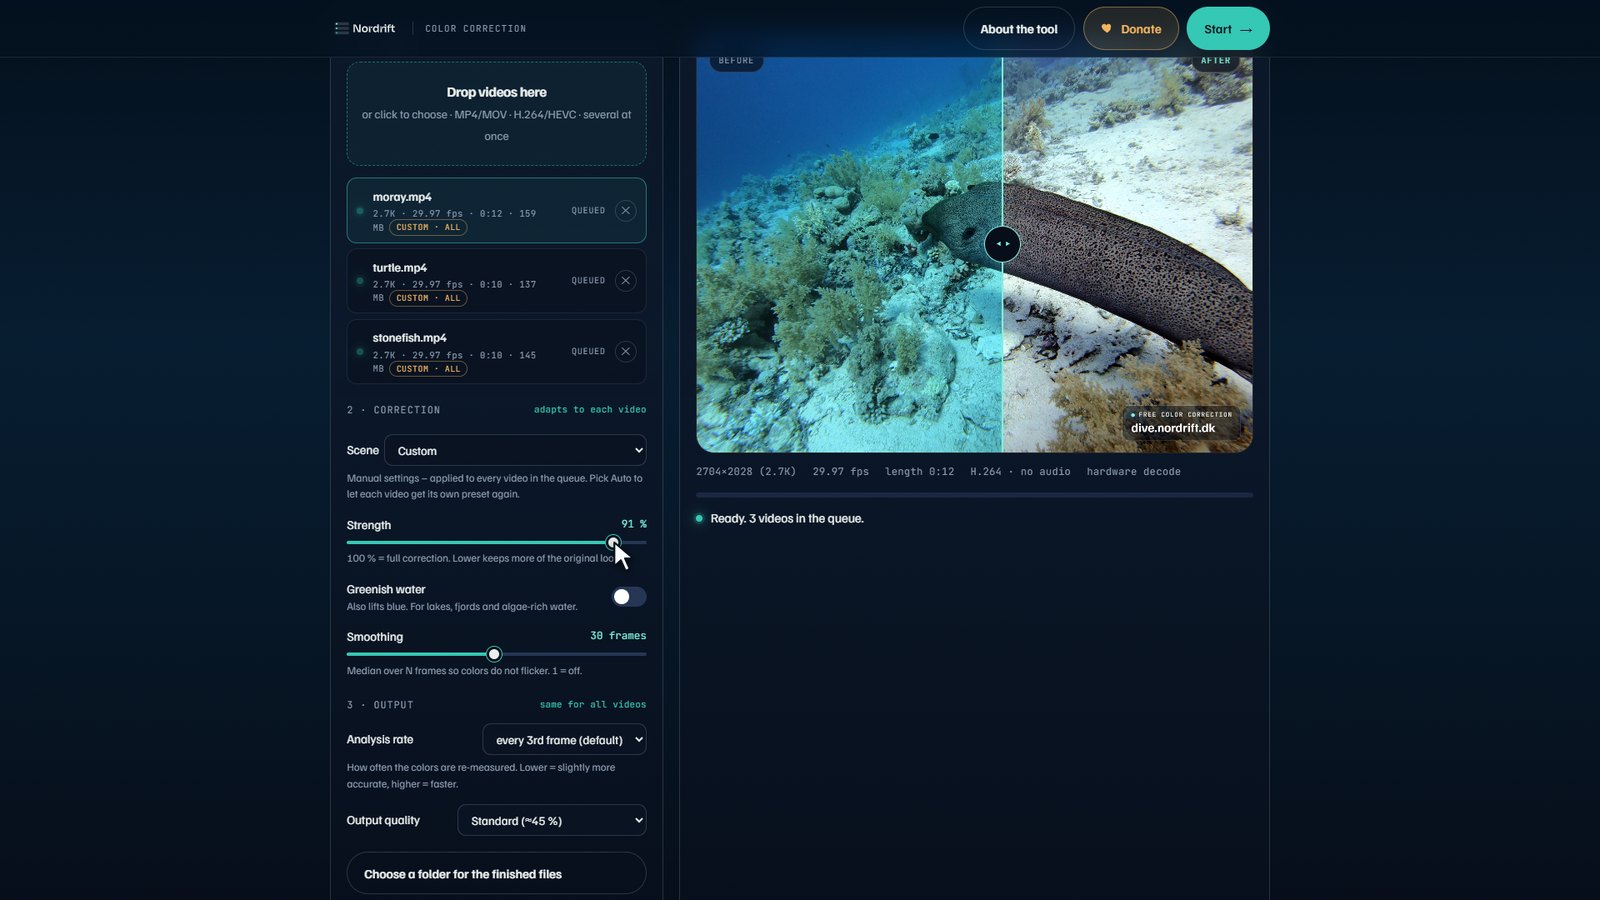
Optional: adjust the correction
Leave the scene on Auto and most dives are done. If you want more or less, use Strength: 100 % is the full correction, 70 % keeps a little of the original blue mood. Greenish water adds a blue lift for lakes, fjords and algae-rich sea. Smoothing averages the measurement over a number of frames so colors never flicker; the default is right for almost everything.
Changes apply to every video in the queue, and the preview updates instantly so you can judge before you start.
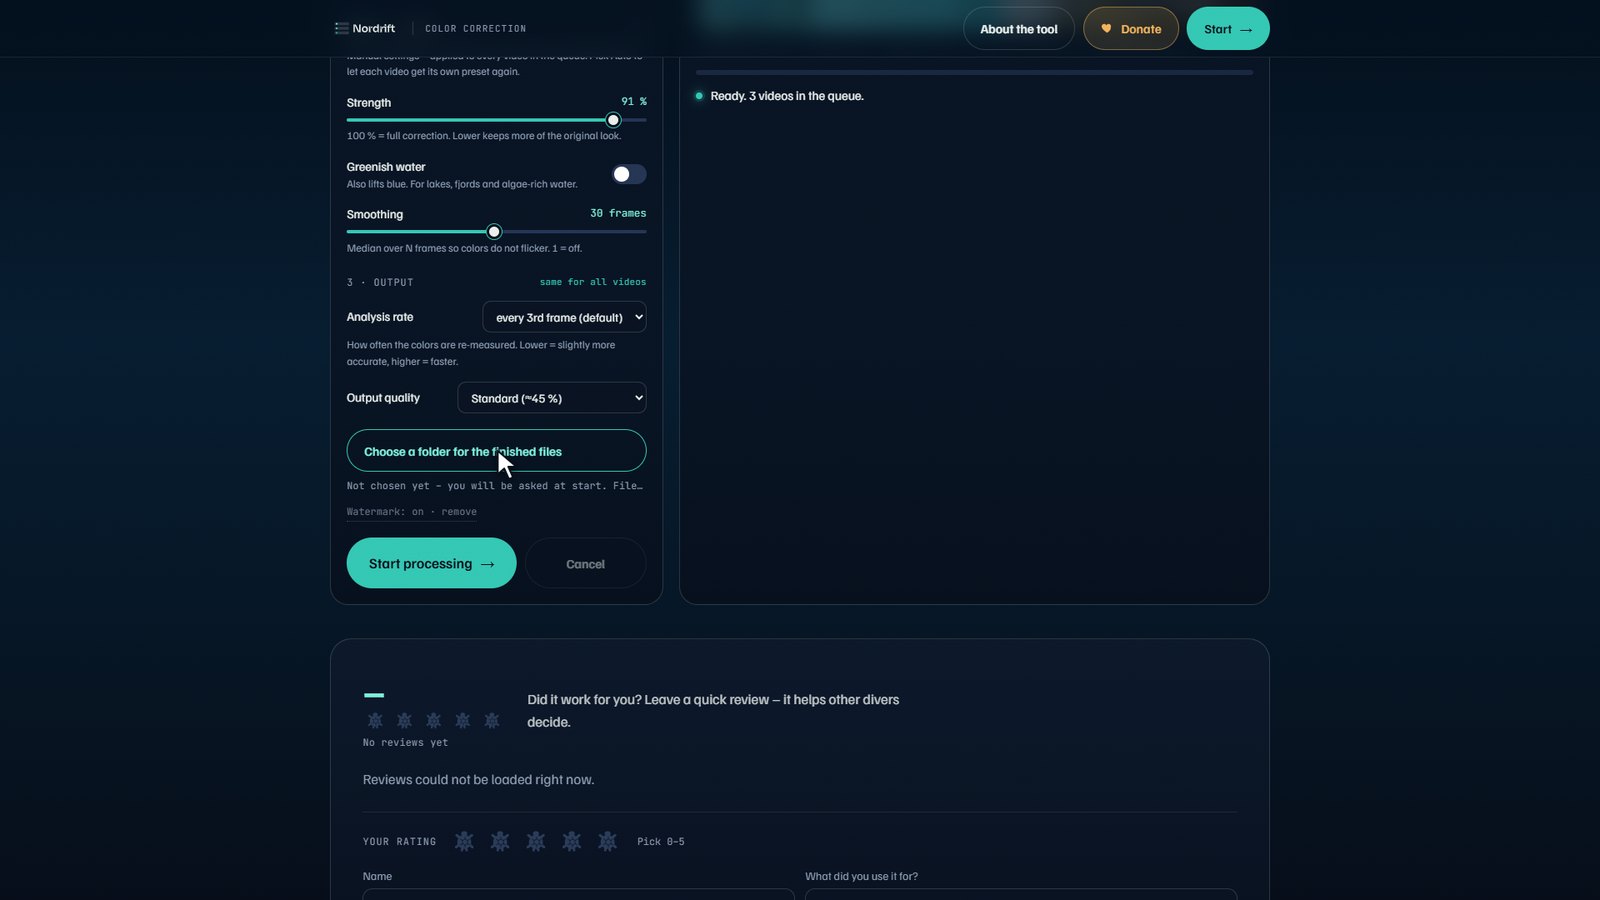
Pick a folder and start
On a computer, choose under Output where the finished files go – a folder next to your originals is a good choice. On a phone there is no folder step: each finished video gets a Save button instead. Each result is saved as name_corrected.mp4, with the audio copied unchanged. Output quality "Standard" is roughly the bitrate of the original; pick "High" for editing projects.
Press Start processing. If you have not chosen a folder yet, the browser asks for one now and asks permission to save there – that is Chrome's normal safety question, say yes.
Watch it work
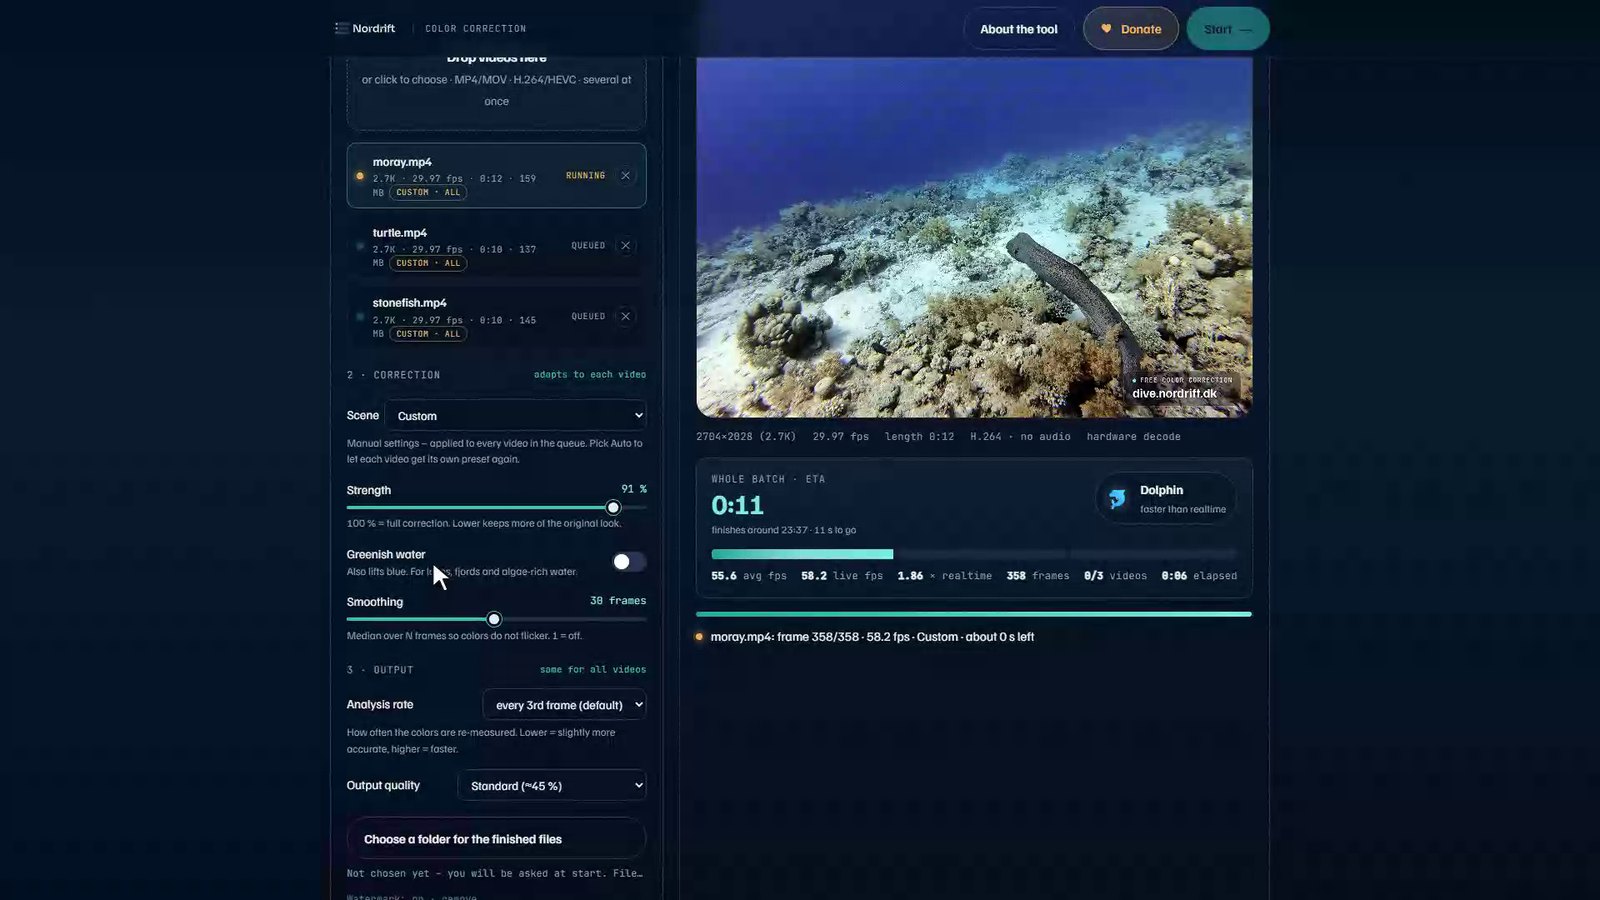
The preview switches to the live result, the batch panel shows an ETA for the whole queue, and a speed class tells you how your computer is doing. Keep the tab open; you can use other windows meanwhile. A typical laptop with hardware decoding runs 4K at close to real time.
Done – share it
When the status says Done, the files are in your folder, ready for YouTube, Instagram or your editing app. Each file carries a small dive.nordrift.dk tag in the corner so other divers can find the tool; you can switch it off under Output. If the tool saved you an evening, a donation keeps it free.
Tips per scene
Auto picks one of these for every clip. If you prefer, set it manually – it then applies to all videos in the queue.
| Scene | When | What it does |
|---|---|---|
| Deep blue | Open water, big animals, blue background | Gentle red lift so water stays blue, not purple. |
| Blue water | Typical reef dive at 10–25 m | Full red compensation, moderate contrast. |
| Reef | Colorful reef close to the camera | Full correction with the strongest red recovery. |
| Close-up | Macro, torches, the subject fills the frame | Protects highlights and skin tones, less stretching. |
| Green water | Lakes, fjords, Baltic, algae | Adds a blue lift on top of the red. |
| Shallow / hazy | Snorkelling, silt, milky water | Caps contrast and saturation so sand looks natural. |